Step-by-Step Deep Learning Tutorial to Build your own Video Classification Model
Overview
- Learn how you can use computer vision and deep learning techniques to work with video data
- We will build our own video classification model in Python
- This is a very hands-on tutorial for video classification – so get your Jupyter notebooks ready
Introduction
I have written extensive articles and guides on how to build computer vision models using image data. Detecting objects in images, classifying those objects, generating labels from movie posters – there is so much we can do using computer vision and deep learning.
This time, I decided to turn my attention to the less-heralded aspect of computer vision – videos! We are consuming video content at an unprecedented pace. I feel this area of computer vision holds a lot of potential for data scientists.
I was curious about applying the same computer vision algorithms to video data. The approach I used for building image classification models – was it generalizable?

Videos can be tricky for machines to handle. Their dynamic nature, as opposed to an image’s static one, can make it complex for a data scientist to build those models.
But don’t worry, it’s not that different from working with image data. In this article, we will build our very own video classification model in Python. This is a very hands-on tutorial so fire up your Jupyter notebooks – this is going to a very fun ride.
If you’re new to the world of deep learning and computer vision, we have the perfect course for you to begin your journey:
What we’ll cover in this Video Classification Tutorial
- Overview of Video Classification
- Steps to build our own Video Classification model
- Exploring the Video Classification dataset
- Training our Video Classification Model
- Evaluating our Video Classification Model
Overview of Video Classification
When you really break it down – how would you define videos?
We can say that videos are a collection of a set of images arranged in a specific order. These sets of images are also referred to as frames.
That’s why a video classification problem is not that different from an image classification problem. For an image classification task, we take images, use feature extractors (like convolutional neural networks or CNNs) to extract features from images, and then classify that image based on these extracted features. Video classification involves just one extra step.
We first extract frames from the given video. We can then follow the same steps as we do for an image classification task. This is the simplest way to deal with video data.
There are actually multiple other ways to deal with videos and there is even a niche field of video analytics. I highly recommend going through the below article to understand how to deal with videos and extract frames in Python:
Also, we will be using CNNs to extract features from the frames of videos. If you need a quick refresher on what CNNs are and how they work, this is where you should begin:
- Architecture of Convolutional Neural Networks (CNNs) demystified
- A Comprehensive Tutorial to learn Convolutional Neural Networks from Scratch
Steps to build Video Classification model
Excited to build a model that is able to classify videos into their respective categories? We will be working on the UCF101 – Action Recognition Data Set which consists of 13,320 different video clips belonging to 101 distinct categories.
Let me summarize the steps that we will be following to build our video classification model:
- Explore the dataset and create the training and validation set. We will use the training set to train the model and validation set to evaluate the trained model
- Extract frames from all the videos in the training as well as the validation set
- Preprocess these frames and then train a model using the frames in the training set. Evaluate the model using the frames present in the validation set
- Once we are satisfied with the performance on the validation set, use the trained model to classify new videos
Let’s now start exploring the data!
Exploring the Video Classification dataset
You can download the dataset from the official UCF101 site. The dataset is in a .rar format so we first have to extract the videos from it. Create a new folder, let’s say ‘Videos’ (you can pick any other name as well), and then use the following command to extract all the downloaded videos:
unrar e UCF101.rar Videos/
The official documentation of UCF101 states that:
“It is very important to keep the videos belonging to the same group separate in training and testing. Since the videos in a group are obtained from a single long video, sharing videos from the same group in training and testing sets would give high performance.”
So, we will split the dataset into the train and test set as suggested in the official documentation. You can download the train/test split from here. Keep in mind that since we are dealing with a large dataset, you might require high computation power.
We now have the videos in one folder and the train/test splitting file in another folder. Next, we will create the dataset. Open your Jupyter notebook and follow the below code block. We will first import the required libraries:
We will now store the name of videos in a dataframe:

This is how the names of videos are given in the .txt file. It is not properly aligned and we will need to preprocess it. Before that, let’s create a similar dataframe for test videos as well:

Next, we will add the tag of each video (for both training and test sets). Did you notice that the entire part before the ‘/’ in the video name represents the tag of the video? Hence, we will split the entire string on ‘/’ and select the tag for all the videos:
So what’s next? Now, we will extract the frames from the training videos which will be used to train the model. I will be storing all the frames in a folder named train_1.
So, first of all, make a new folder and rename it to ‘train_1’ and then follow the code given below to extract frames:
This will take some time as there are more than 9,500 videos in the training set. Once the frames are extracted, we will save the name of these frames with their corresponding tag in a .csv file. Creating this file will help us to read the frames which we will see in the next section.
So far, we have extracted frames from all the training videos and saved them in a .csv file along with their corresponding tags. It’s now time to train our model which we will use to predict the tags for videos in the test set.
Training the Video Classification Model
It’s finally time to train our video classification model! I’m sure this is the most anticipated section of the tutorial. I have divided this step into sub-steps for ease of understanding:
- Read all the frames that we extracted earlier for the training images
- Create a validation set which will help us examine how well our model will perform on unseen data
- Define the architecture of our model
- Finally, train the model and save its weights
Reading all the video frames
So, let’s get started with the first step where we will extract the frames. We will import the libraries first:
Remember, we created a .csv file that contains the names of each frame and their corresponding tag? Let’s read it as well:
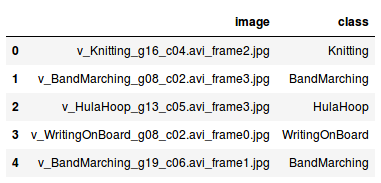
This is how the first five rows look like. We have the corresponding class or tag for each frame. Now, using this .csv file, we will read the frames that we extracted earlier and then store those frames as a NumPy array:
Output: (73844, 224, 224, 3)
We have 73,844 images each of size (224, 224, 3). Next, we will create the validation set.
Creating a validation set
To create the validation set, we need to make sure that the distribution of each class is similar in both training and validation sets. We can use the stratify parameter to do that:
Here, stratify = y (which is the class or tags of each frame) keeps the similar distribution of classes in both the training as well as the validation set.
Remember – there are 101 categories in which a video can be classified. So, we will have to create 101 different columns in the target, one for each category. We will use the get_dummies() function for that:
Next step – define the architecture of our video classification model.
Defining the architecture of the video classification model
Since we do not have a very large dataset, creating a model from scratch might not work well. So, we will use a pre-trained model and take its learnings to solve our problem.
For this particular dataset, we will be using the VGG-16 pre-trained model. Let’s create a base model of the pre-trained model:
This model was trained on a dataset that has 1,000 classes. We will fine tune this model as per our requirement. include_top = False will remove the last layer of this model so that we can tune it as per our need.
Now, we will extract features from this pre-trained model for our training and validation images:
Output: (59075, 7, 7, 512)
We have 59,075 images in the training set and the shape has been changed to (7, 7, 512) since we have passed these images through the VGG16 architecture. Similarly, we will extract features for validation frames:
Output: (14769, 7, 7, 512)
There are 14,769 images in the validation set and the shape of these images has also changed to (7, 7, 512). We will use a fully connected network now to fine-tune the model. This fully connected network takes input in single dimension. So, we will reshape the images into a single dimension:
It is always advisable to normalize the pixel values, i.e., keep the pixel values between 0 and 1. This helps the model to converge faster.
Next, we will create the architecture of the model. We have to define the input shape for that. So, let’s check the shape of our images:
Output: (59075, 25088)
The input shape will be 25,088. Let’s now create the architecture:
We have multiple fully connected dense layers. I have added dropout layers as well so that the model will not overfit. The number of neurons in the final layer is equal to the number of classes that we have and hence the number of neurons here is 101.
Training the video classification model
We will now train our model using the training frames and validate the model using validation frames. We will save the weights of the model so that we will not have to retrain the model again and again.
So, let’s define a function to save the weights of the model:
We will decide the optimum model based on the validation loss. Note that the weights will be saved as weights.hdf5. You can rename the file if you wish. Before training the model, we have to compile it:
We are using the categorical_crossentropy as the loss function and the optimizer is Adam. Let’s train the model:
I have trained the model for 200 epochs. To download the weights which I got after training the model, you can use this link.
We now have the weights which we will use to make predictions for the new videos. So, in the next section, we will see how well this model will perform on the task of video classification!
Evaluating our Video Classification Model
Let’s open a new Jupyter notebook to evaluate the model. The evaluation part can also be split into multiple steps to understand the process more clearly:
- Define the model architecture and load the weights
- Create the test data
- Make predictions for the test videos
- Finally, evaluate the model
Defining model architecture and loading weights
You’ll be familiar with the first step – importing the required libraries:
Next, we will define the model architecture which will be similar to what we had while training the model:
This is the pre-trained model and we will fine-tune it next:
Now, as we have defined the architecture, we will now load the trained weights which we stored as weights.hdf5:
Compile the model as well:
Make sure that the loss function, optimizer, and the metrics are the same as we used while training the model.
Creating the test data
You should have downloaded the train/test split files as per the official documentation of the UCF101 dataset. If not, download it from here. In the downloaded folder, there is a file named “testlist01.txt” which contains the list of test videos. We will make use of that to create the test data:

We now have the list of all the videos stored in a dataframe. To map the predicted categories with the actual categories, we will use the train_new.csv file:
Now, we will make predictions for the videos in the test set.
Generating predictions for test videos
Let me summarize what we will be doing in this step before looking at the code. The below steps will help you understand the prediction part:
- First, we will create two empty lists – one to store the predictions and the other to store the actual tags
- Then, we will take each video from the test set, extract frames for this video and store it in a folder (create a folder named temp in the current directory to store the frames). We will remove all the other files from this folder at each iteration
- Next, we will read all the frames from the temp folder, extract features for these frames using the pre-trained model, predict tags, and then take the mode to assign a tag for that particular video and append it in the list
- We will append actual tags for each video in the second list
Let’s code these steps and generate predictions:
This step will take some time as there are around 3,800 videos in the test set. Once we have the predictions, we will calculate the performance of the model.
Evaluating the model
Time to evaluate our model and see what all the fuss was about.
We have the actual tags as well as the tags predicted by our model. We will make use of these to get the accuracy score. On the official documentation page of UCF101, the current accuracy is 43.90%. Can our model beat that? Let’s check!
Output: 44.80570975416337
Great! Our model’s accuracy of 44.8% is comparable to what the official documentation states (43.9%).
You might be wondering why we are satisfied with a below 50% accuracy. Well, the reason behind this low accuracy is majorly due to lack of data. We only have around 13,000 videos and even those are of a very short duration.
End Notes
In this article, we covered one of the most interesting applications of computer vision – video classification. We first understood how to deal with videos, then we extracted frames, trained a video classification model, and finally got a comparable accuracy of 44.8% on the test videos.
We can now try different approaches and aim to improve the performance of the model. Some approaches which I can think of are to use 3D Convolutions which can directly deal with videos.
Since videos are a sequence of frames, we can solve it as a sequence problem as well. So, there can be multiple more solutions to this and I suggest you explore them. Feel free to share your findings with the community.
As always, if you have any suggestions or doubts related to this article, post them in the comments section below and I will be happy to answer them. And as I mentioned earlier, do check out the computer vision course if you’re new to this field.


What is the significance of this step? `if (frameId % math.floor(frameRate) == 0)`
not sure if this was answered, but I think it is making sure that the framerate matches with each image, so that it is accurately mapping all the images in each video
FrameRate= Number of Frames per second i.e 30 30 frames per second For every second we are taking one frame into account So after that step we have an image of every second
Hi Pulkit, First of all thanks for your useful articles. Can I get the link for the code of this project. It will be really helpful.
Hi Garima, All the codes are provided in this article itself.
Do we need to change each and every file name in video for training
Hi Jayasree, You have to pick the names of each video file first and then pre-process it. I have used a for loop to pick each of the videos.
IndexError: list index out of range i got this error when creating the csv file. please help me .
Hi, What code are you using?
Hi, How can wd convert into realtime prediction in my webcam?